If you've ever worked with construction sites, mining operations, or remote workshops, you know a screw air compressor is more than just a piece of machinery-it's the backbone of your daily operations. As a screw air compressor supplier, I've seen firsthand how rushing the transport process can turn a costly, reliable machine into a broken, down-time nightmare. Over the past 12 years, I've helped dozens of clients avoid common transport mistakes, from dented airends to cracked fuel tanks, simply by following a structured, safety-first approach. Today, I'm breaking down exactly how to transport a screw air compressor safely, with real-world tips I've picked up working with everything from our compact portable units to our heavy-duty mining models.
First, before you even fire up a truck or roll out a trailer, you need to do a pre-transport inspection that covers every critical part of your compressor. This isn't a quick walkaround-it's a deep dive into the components that will get damaged if you skip steps. Start with the core of the machine: the screw airend. This precision-built component has two intermeshing rotors with tight tolerances, even a small knock during transport can bend the rotors or cause misalignment, leading to years of reduced performance. To protect it, drain all compressed air from the system first-trapped air expands at altitude or with temperature changes, and can build enough pressure to blow off hoses or crack the compressor frame.
Once your compressor is prepped and ready, the next step is choosing the right transport method for your unit. Not all compressors are built the same, so a one-size-fits-all trailer or truck won't work. If you're moving a small, light-duty unit for a weekend construction job or small workshop, a pick-up truck with a durable bed liner can work, but only if you follow weight limits (exceeding payload can strain the truck's suspension and lead to brake failure) and secure the unit properly.
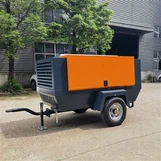
Securing the compressor to your transport vehicle is the single most important step to prevent damage during transit. I've seen clients cut corners here: using cheap ratchet straps that slip, or only securing the compressor from one side, and end up with a broken compressor and a damaged trailer. Follow the "four-point anchor rule" every time, no exceptions. This means using four rated straps (each with a working load limit that's 3–5 times the compressor's weight) attached to the compressor's built-in lifting lugs, not to the frame or external parts like the fuel tank. Lifting lugs are engineered to handle the machine's full weight, so they won't snap during transit. For compressors with skid mounts (most portable models come standard with these), run two straps along the length of the skid and two across the width, crisscrossing them to distribute tension evenly. For wheeled portable units (like our ZD-20/20 Diesel Engine Portable Screw Air-compressor 20 Bar), always lock the wheels in place with wheel chocks before securing the straps. Add extra protection for fragile parts: wrap the radiator, exhaust, and control panel in foam padding or a heavy-duty moving blanket, and use corner guards on the edges of the compressor to prevent straps from scratching the paint or piercing the metal. A quick tip I learned years ago: test the security of your load by grabbing the top of the compressor and shaking it firmly. If it moves more than an inch in any direction, your straps are too loose.
Before you hit the road, do a final check of your transport route. This step is often overlooked, but it can save you from major headaches. Measure the height and width of your fully assembled compressor (including any protrusions like exhaust stacks or control panels) and make sure your route has clear overpasses, bridge clearances, and road width limits. For example, a 10-foot-tall compressor that looks fine on a flatbed might get stuck under an 11-foot overpass-common on rural roads and industrial sites. If you're transporting a compressor to a remote mine or construction site, call ahead to confirm the access road is wide enough, free of deep potholes, and has clear turns. Even a small pothole that would cause a passenger car to bump can jostle a heavy screw compressor loose or crack its frame. Also, check the weather forecast-avoid transporting in heavy rain, snow, or high winds, which can make steering difficult and put extra stress on your straps and load. If you have to transport in wet conditions, cover the compressor with a waterproof tarp, leaving the control panel and air outlet accessible if you need to check for leaks.
During transit, take regular breaks to check your load. I always advise clients to stop every 50 miles or after the first hour of driving, then every two hours, to inspect the straps, wheel chocks, and compressor for any signs of shifting. Long highway drives can cause ratchet straps to loosen due to vibration-even straps that felt tight when you left the yard can slip after a few miles. If you notice a strap is loose, pull over to a safe, well-lit area, re-tighten it, and double-check all other straps. Never try to adjust straps while driving-it's a major safety risk for you and other drivers. Also, keep an eye on your compressor's temperature if you're driving in hot weather-trapped heat under a tarp can damage plastic parts or cause fuel to expand, leading to leaks. If your compressor is enclosed in a truck bed, leave the side gates open slightly to allow air circulation.
Once you arrive at your destination, the work isn't done yet-you need to unload the compressor safely and prepare it for use. Never try to unload a heavy compressor by yourself; use a crane, forklift, or flatbed trailer with a ramp rated for at least twice the compressor's weight. When using a crane, attach straps only to the built-in lifting lugs, not to the skid or external parts, to avoid damaging the compressor. After unloading, inspect every part again: check for dents in the airend, cracks in the fuel tank or frame, loose wiring, and any fluid leaks. Once you've confirmed the compressor is undamaged, refill the crankcase oil and fuel tank, reconnect all wiring and hoses, and run a test cycle at low pressure to make sure everything works. If you notice any unusual noises or leaks, contact a professional technician before putting the compressor to work-small issues during transport can turn into major breakdowns if ignored.

As a screw air compressor supplier, my top priority is making sure your machine arrives safely and performs as well as it did the day you bought it. Transporting these units takes careful planning, but following these steps will eliminate 90% of the common damage and safety risks. Whether you're moving a small portable compressor to a residential job or a heavy-duty mining unit to a remote quarry, taking the time to prep, secure, and check your load will save you thousands in repair costs and downtime. If you're in the market for a reliable, transport-ready screw air compressor for your next project, or have questions about safe transport for any of our models, feel free to reach out and connect with our team to discuss your needs and get a custom solution for your operations.
References
- Compressed Air and Gas Institute. (2021). Best Practices for Transporting Portable Industrial Compressors. Retrieved from CAGI Industry Standards
- Occupational Safety and Health Administration (OSHA). (2019). Material Handling and Storage Standards for Heavy Machinery. U.S. Department of Labor
- Screw Compressor Technical Association. (2022). Pre-Transport Inspection Protocols for Rotary Screw Equipment. Technical Report Series
-
Explore our diesel screw air compressor